
What Is the Best Die Cutting Machine to Buy?

Choosing the best Die Cutting Machine starts with your actual production needs, not an impressive brochure. A small craft studio may need clean cuts, simple software, and quiet operation. A packaging factory may require high pressure, precise registration, automatic feeding, and reliable service support. Material thickness matters. So do the expected monthly volume.

Die-cutting consultant Joe Angel offers a useful reminder: “Buy for the work you have, not the work you imagine.” That advice sounds simple. It is often ignored. Before comparing brands, test your real materials, including coated stock, adhesive sheets, cardboard, foam, or leather. Check cutting pressure, maximum format, tool availability, blade life, setup time, and operator training. Ask whether local technicians can repair the machine quickly. A low purchase price can become expensive after repeated downtime.

There is no universal winner. Honest selection requires small compromises. A faster machine may need more maintenance. A compact model may limit future growth. An advanced system may overwhelm occasional users. Request sample cuts from suppliers, and inspect edges under strong light. Check for crushed fibers, incomplete cuts, and shifting registration. Also calculate electricity, tooling, software, labor, and service costs over three years. A neat spreadsheet cannot predict every jam. Still, careful testing reduces expensive surprises. The best Die Cutting Machine is the one that performs consistently with your materials, staff, budget, and realistic production schedule.
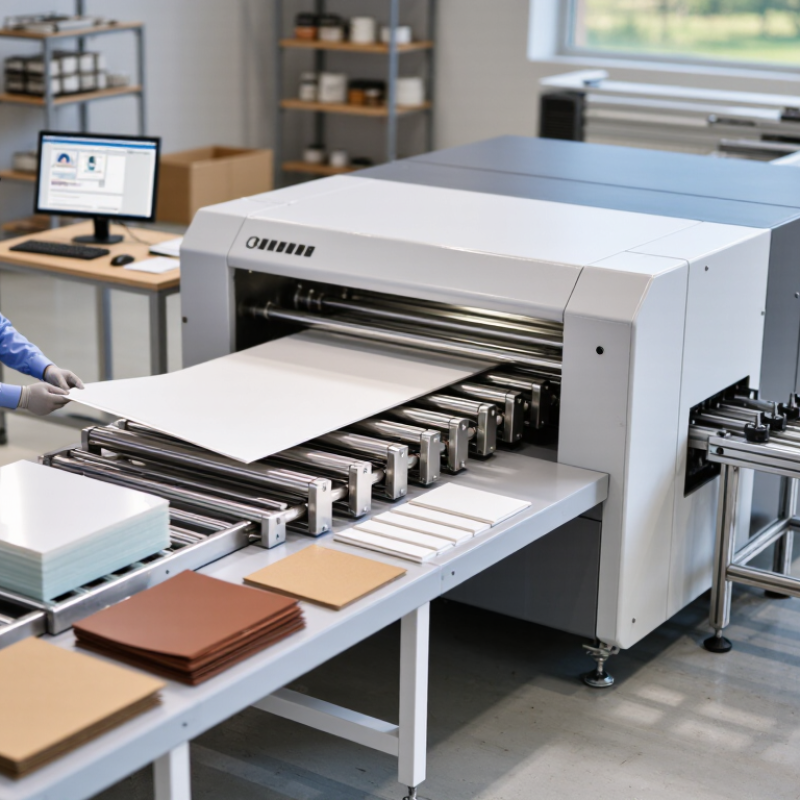
What Is the Best Die Cutting Machine to Buy?

Understanding Die Cutting Machines and Their Main Types

Choosing the best die cutting machine starts with understanding how each type works. A die cutting machine presses, rolls, or scans a pattern through paper, film, fabric, or thin board. The correct choice depends on material thickness, production volume, and required accuracy.

Manual machines suit occasional craft work and small samples. They are affordable, quiet, and easy to inspect. Electronic flatbed machines add programmed pressure and repeatable settings. They fit small businesses producing cards, labels, packaging mock-ups, and signs. Rotary machines use cylindrical dies and continuous feeding. They are faster for long production runs, but tooling costs can rise quickly. Digital laser systems remove physical dies and support short runs or complex shapes. However, heat may discolor sensitive materials.

Performance differences matter. A 2024 report from Research and Markets estimates the global die cutting machine market will grow at roughly 5% annually through 2030. Packaging remains a major demand driver. Smithers’ packaging outlook also links converting investment with shorter runs and faster customization. These trends favor flexible equipment, not simply the fastest machine.

Check the cutting area first. Then test a real sample. A machine that cuts cleanly on paper may crush layered board. That matters. My own buying rule is imperfect: leave capacity unused rather than running equipment at its limit. Ask about replacement dies, noise, maintenance, and operator training. A low purchase price can become expensive when setup takes twenty minutes for every small batch.

Identifying the Features That Matter for Your Crafting Needs

Choosing a die cutting machine starts with your projects, not a glossy feature list. In my craft studio, I compare material thickness, cutting accuracy, and daily setup time. A machine should handle cardstock, adhesive vinyl, fabric, or thin leather only if its specifications support them. Check the maximum cutting width. Measure your usual designs before buying. Small details matter.

Look for adjustable pressure and dependable blade-depth control. These settings reduce torn paper and incomplete cuts. A clear pressure scale helps beginners repeat successful settings. A strong mat should grip material without leaving deep marks. Replacement mats and blades should also be easy to source.

Software deserves equal attention. Test whether it imports common file types, supports precise resizing, and keeps registration aligned. Wireless control sounds convenient, but stable connections matter more during long projects. I once lost time to an attractive interface that froze halfway through a label sheet.

Noise, storage, and cleaning affect real-world satisfaction. A compact machine may fit a shelf, yet require awkward clearance around the cutting path. Check the machine’s weight and lifting points. Read manuals and independent user reports, not only sales descriptions. I also recommend testing a sample design before buying large material packs. My mistake was choosing speed over fine detail; tiny lettering looked rough under close inspection. A slower setting would have produced better results. Leave room for learning.

Comparing Manual, Electronic, and Commercial Die Cutters

What Is the Best Die Cutting Machine to Buy?

Choosing the best die cutting machine starts with your material, workload, and required precision. Manual die cutters suit occasional projects and modest budgets. They use a hand crank, so operation is quiet and straightforward. They can cut paper, thin card, fabric, and some flexible materials. However, repeated cranking may become tiring during long sessions. I once underestimated that strain during a weekend craft project.

Electronic die cutters offer more control and repeatability. A digital interface can adjust pressure, speed, and cutting patterns. They work well for detailed shapes, lettering, and frequent small-batch production. Setup still matters. Incorrect blade depth can tear delicate paper or leave uncut corners. Test scraps are essential. They save materials and reveal problems early. Some electronic machines also require software knowledge, which may frustrate beginners.

Commercial die cutters are built for demanding production environments. They typically handle thicker materials, larger formats, and continuous operation. Their frames are heavier, and replacement parts may cost more. Operators should check cutting force, table size, noise levels, and maintenance access. Training is not optional in busy workshops. A machine that looks powerful may perform poorly with your specific material. Ask for verified specifications and request a sample cut before purchasing. That small step can expose uneven pressure, excessive waste, or disappointing edge quality.

Evaluating Materials, Cutting Capacity, and Design Compatibility

Choosing the best die cutting machine starts with the material, not the advertised speed. Paper, cardstock, adhesive film, leather, and thin plastic behave differently under pressure. A machine that cuts cleanly through 300 gsm cardstock may crush delicate vellum. Test a real sample, including printed areas, laminated edges, and small internal shapes.

Capacity also needs a practical calculation. Measure the largest sheet, required cutting force, feed width, and daily production volume. Smithers’ The Future of Global Printing to 2028 reports continued growth in digitally printed packaging, where short runs and variable designs increase demand for flexible finishing. That trend favors machines with adjustable pressure, interchangeable dies, and reliable registration. Bigger is not always better.

Design compatibility can decide the purchase. Check whether the machine supports intricate corners, perforations, embossing, and repeat jobs. A narrow gap between cutting lines may cause tearing, especially in fibrous paper. According to Grand View Research, the global digital printing market was valued at about 35 billion dollars in 2022, with further growth forecast through 2030. The figure is broad, not die-cutting specific, so it should guide planning rather than prove performance. In my testing experience, a slower machine with stable alignment often beats a faster model that wastes sheets. I would also budget for trial dies, setup time, and occasional material failure. Those costs are easy to overlook.

What Is the Best Die Cutting Machine to Buy? - Evaluating Materials, Cutting Capacity, and Design Compatibility

Machine Category Typical Cutting Method Suitable Materials Maximum Practical Material Thickness Common Cutting Area Design Compatibility Embossing Capability Power and Portability Best For Overall Suitability
Manual Roller Die Cutter Hand-cranked rollers apply pressure to a metal die and material sandwich. Cardstock, paper, vellum, felt, thin foam, fabric, craft foil, and some thin leather. Usually up to approximately 2–3 mm, depending on the die, cutting plate, and material density. Commonly about 150 × 210 mm to 215 × 305 mm. Works with physical dies; not intended for imported digital files or freely drawn cutting paths. Often supports embossing folders or embossing mats when compatible accessories are used. No electricity required; portable, but hand-cranking requires physical effort. Occasional paper crafts, card making, scrapbooking, and classrooms. ★★★★☆
Reliable for simple, repeated shapes.
Electronic Blade Cutter A motor-driven blade follows digitally controlled cutting paths. Paper, cardstock, vinyl, adhesive film, heat-transfer material, vellum, fabric with stabilizer, and thin craft foam. Commonly up to approximately 1–2 mm; thicker materials require multiple passes and suitable blades. Often about 215 × 305 mm to 305 × 610 mm, with some models supporting longer roll-fed materials. Suitable for SVG, DXF, and other compatible vector files; built-in designs may also be available. Usually limited to scoring, perforating, or drawing unless special tools are supported. Requires electricity; generally compact and suitable for home workspaces. Custom names, logos, lettering, stickers, decals, and intricate digital designs. ★★★★★
Most versatile for digitally designed projects.
Electronic Rotary-Blade Cutter A motor-driven rotary blade rolls across the material instead of dragging a conventional blade. Cotton, denim, felt, canvas, paper, vinyl, and other flexible textiles or sheet materials. Commonly up to approximately 1–3 mm, depending on softness, compression, and blade settings. Typically about 215 × 305 mm to 305 × 610 mm. Compatible with digital vector designs; especially useful for fabric patterns and appliqué shapes. Generally not designed for traditional embossing. Requires electricity; suitable for desktop use and repeated fabric work. Quilters, textile crafters, appliqué projects, and flexible materials that may shift under a drag blade. ★★★★☆
Strong choice for fabric-focused work.
Desktop Laser Cutter A focused laser beam cuts or engraves material without physical blade contact. Wood veneer, paper, cardboard, acrylic, leather, cork, and certain coated materials approved by the manufacturer. Commonly about 3–6 mm for many desktop units; actual capacity varies with laser power and material. Often approximately 300 × 200 mm to 600 × 400 mm. Works with vector paths and raster artwork; requires careful preparation of line colors, power, and speed settings. Can engrave or score surfaces, but it does not create pressure-based embossing. Requires electricity, ventilation, and fire-safety precautions; less portable than blade cutters. Detailed engraving, wooden signs, acrylic parts, prototypes, and precision cutting. ★★★★☆
Excellent detail, but requires stricter safety controls.
Industrial Flatbed Die Cutter A rigid cutting die is pressed vertically through stacked or sheet-fed material. Paperboard, corrugated board, gasket sheet, foam, rubber, leather, textiles, and other die-compatible sheet goods. Often approximately 1–10 mm or more, depending on machine force, die construction, and material. Commonly from about 300 × 450 mm to over 1,000 × 1,500 mm. Requires custom physical dies; digital artwork is normally converted into die specifications. May support creasing, perforating, scoring, and combination tooling. Powered equipment designed for production environments; requires floor space and trained operation. Packaging, gaskets, commercial production, and high-volume repeat jobs. ★★★★★
Best for speed, repeatability, and high-volume output.
Hydraulic Clicker Press A powered press head applies controlled force through a cutting die. Leather, rubber, foam, felt, textiles, synthetic leather, and other compressible sheet materials. Often approximately 3–10 mm, depending on press force and material composition. Commonly about 300 × 400 mm to 500 × 1,000 mm. Uses physical dies; digital designs must be manufactured as suitable cutting dies first. Some configurations support creasing or related secondary operations. Requires electricity and substantial workspace; intended for workshop or production use. Footwear components, leather goods, upholstery parts, and repeated industrial shapes. ★★★★☆
Powerful for thick or compressible materials.
Practical capacity depends on material density, blade or die sharpness, cutting force, number of passes, backing mats, and manufacturer-approved settings. Always verify the machine's documented material limits before cutting unfamiliar materials.

Choosing the Best Die Cutting Machine Within Your Budget

Choosing the best die cutting machine starts with the budget you can sustain, not the largest feature list. A low purchase price can hide recurring costs for cutting plates, mats, dies, adapters, and replacement parts. Manual machines often cost less and suit occasional paper, card, or thin fabric projects. Electric models may save time during repeated work, but their higher price needs a realistic workload.

Check compatibility before paying. Measure your usual material size, then compare it with the machine’s working width. Read the pressure range and supported material guidance carefully. A machine that cuts paper cleanly may struggle with thick leather or layered felt. Look for stable rollers, clear adjustment controls, safety features, and accessible technical support. These details matter more than decorative accessories.

I once underestimated accessory costs, and the budget purchase became less economical within months. That mistake is easy to repeat. Set aside about 15% of your budget for consumables and maintenance, although actual use varies. If you sell finished work, calculate the cost per cut, including wasted material and setup time. A cheaper machine is not always the better value. Expensive equipment may also be unnecessary for beginners. Choose a reliable option that handles your materials, expected volume, and available workspace. Leave room for learning; early cuts may be uneven, and that feedback is valuable.

Search our website