7 Tips for Swiss Turning Titanium Bone Screws
Producing titanium bone screws demands more than a precise machine and a sharp tool. Titanium is lightweight, strong, and biocompatible, yet it can generate heat quickly during cutting. Its low thermal conductivity also increases tool wear near threads and small features. In real Swiss turning work, a tiny burr can affect cleaning, assembly, or clinical performance. No process is flawless. Careful control still matters.
This guide presents seven practical tips for improving Swiss turning results. It covers stable workholding, suitable carbide tools, controlled cutting speeds, and consistent coolant delivery. It also examines thread quality, chip evacuation, and inspection methods for miniature bone screws. Swiss Turning Services For Titanium Bone Screws should include more than production speed. Reliable results require documented settings, measured dimensions, and traceable material records. Experienced machinists usually watch tool edges closely, especially after repeated cycles. A faint rubbing sound can signal trouble before visible defects appear.
Quality decisions should follow the screw design, alloy, and intended manufacturing requirements. Medical production often requires disciplined procedures, validated processes, and clear inspection evidence. These tips support that mindset without promising universal results. A setting that works for one titanium grade may fail on another. That limitation deserves attention. Testing, measurement, and revision remain essential. With practical experience and qualified engineering review, manufacturers can reduce burrs, protect delicate threads, and build a more consistent machining process.
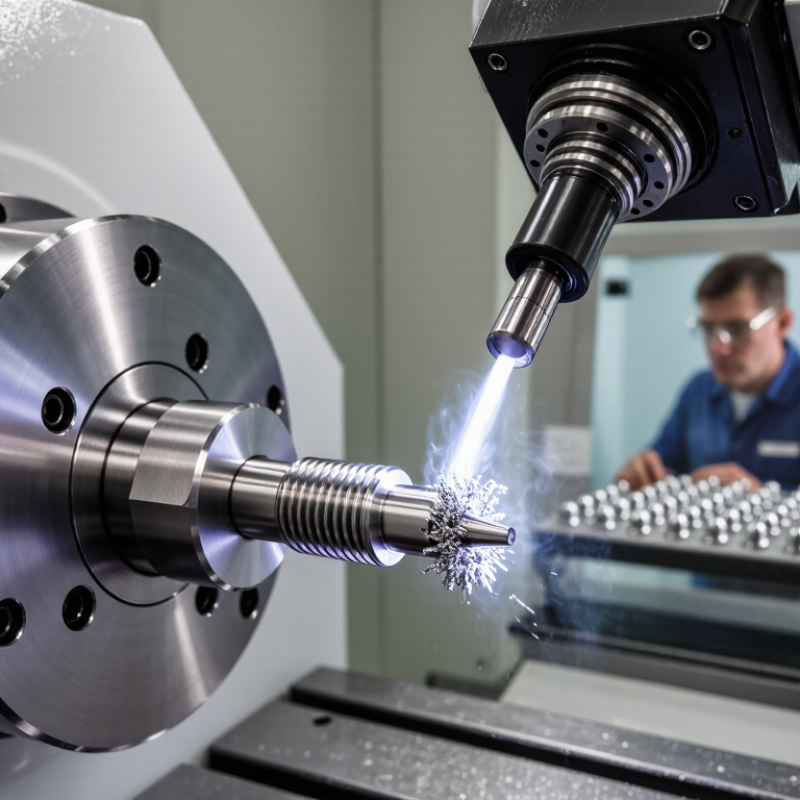
Titanium Bone Screw Material Properties and Swiss Turning Requirements
Swiss turning titanium bone screws starts with understanding the material, not copying steel parameters. Ti-6Al-4V ELI is widely used for implant components. ASTM F136 defines its chemical and mechanical requirements. ASM Handbook data report a density near 4.43 g/cm³ and an elastic modulus near 110 GPa.
Tip 1: verify the heat lot and mill certificate. Tip 2: keep bar support rigid. Titanium deflects easily.
Low thermal conductivity changes the cutting strategy. ASM Handbook data place titanium alloy conductivity near 6.7 W/m·K. Heat stays close to the cutting edge.
Tip 3: use sharp, polished carbide tools with controlled edge preparation. Tip 4: maintain stable coolant delivery. Tip 5: control chip thickness instead of simply increasing feed. Long chips are dangerous for consistency. They also damage surfaces. A perfect parameter sheet is a myth. Actual results depend on tool overhang, machine stiffness, and thread geometry.
Tip 6: protect the thread crest during turning, grooving, and parting. Tip 7: inspect pitch diameter, burrs, surface finish, and concentricity after cleaning.
ISO 5832-3 and ASTM F136 provide useful material references, but neither replaces process validation. In practice, I would record tool life by heat lot. Small hardness changes can alter burr formation. Do not assume passivation will hide poor machining. Reflection matters here: a visually bright screw can still carry a damaging microscopic tear. Reliable production needs documented first-piece inspection, calibrated gauges, and traceability from raw bar to finished implant.
Selecting Cutting Tools and Machining Parameters for Titanium Alloys
Swiss turning titanium bone screws demands disciplined tool selection and controlled machining parameters. Choose sharp carbide inserts with a positive rake and polished cutting edges. A small nose radius can reduce cutting pressure on miniature threads. Avoid worn edges; titanium work-hardens quickly after rubbing. Keep tool overhang short and support slender blanks firmly.
Begin with conservative cutting data. For common titanium alloys, try 40–60 m/min cutting speed, then adjust after observing heat and chip behavior. Use a moderate feed, often around 0.02–0.06 mm per revolution for small features. Keep depths of cut consistent. Interrupted cuts may need lower speeds and stronger edge preparation. Apply high-pressure coolant directly at the cutting zone, not beside it. Short, curled chips are a useful sign.
Threading needs special care. Use multiple passes instead of forcing one deep cut. Check the thread crest under magnification after the first pieces. I have found that a visually clean part can still contain subsurface damage. Measure burrs, flank dimensions, surface finish, and tool life for each batch. Record changes in alloy hardness and bar diameter. One setting rarely survives every lot. When chatter appears, reduce overhang before changing everything else. Validate final parameters through documented trials, dimensional inspection, and qualified process review.
7 Tips for Swiss Turning Titanium Bone Screws: Cutting Tools and Machining Parameters
Typical starting ranges for small-diameter titanium alloy bone screws. Use a sharp, positive-rake carbide tool, high-pressure coolant, rigid workholding, and adjust parameters according to alloy, screw diameter, tool overhang, and machine stability.
The chart shows practical starting cutting-speed windows for common Swiss-turning operations. Lower speeds and feeds are generally preferred for thread cutting and small-feature finishing, while drilling and rough turning require careful chip evacuation and thermal control.
Preparing Swiss-Type Lathes for Small, Precision Bone Screw Production
Preparing a Swiss-type lathe for small, precision bone screw production demands disciplined setup. Start with clean, straight titanium bar stock and confirm the material certificate. Check guide-bushing clearance carefully. Too much clearance can increase vibration and damage thread accuracy. Too little can mark the surface. Small details matter.
Use sharp, rigid tools with suitable geometry for titanium. Keep tool overhang short, especially during thread cutting and head forming. Set conservative cutting parameters, then adjust them after observing chip shape and tool wear. Manage heat with steady coolant flow, not excessive pressure. Long, stringy chips are a warning. Stop and correct them safely. A properly aligned sub-spindle also supports consistent part transfer and reduces distortion.
Measure the first pieces at critical features, including major diameter, thread profile, head dimensions, and cannulation position. Inspect under magnification for burrs around the cutting flute. Record offsets, tool life, coolant condition, and inspection results. Traceability is essential for controlled medical-device production. In practice, experienced operators sometimes tighten the guide bushing too aggressively, assuming rigidity always improves accuracy. It can create drag and unstable feeding. I have also found that a perfect first part does not guarantee a stable run. Titanium behavior changes as tools wear. Recheck the process at planned intervals, and treat unexpected measurements as useful evidence rather than inconvenient mistakes.
Managing Chip Control, Heat, and Tool Wear During Screw Turning
7 Tips for Swiss Turning Titanium Bone Screws
Managing Chip Control, Heat, and Tool Wear During Screw Turning
Swiss turning titanium bone screws demands control, not simply higher cutting speed. Ti-6Al-4V has thermal conductivity near 6.7 W/m·K, according to ASM Handbook material data. Heat therefore remains close to the cutting edge. I use sharp, polished carbide inserts with positive geometry. A generous coolant stream must reach the tool-chip contact zone. Flood delivery often works better than a mist system here. Keep chip breakers matched to the thread profile. Long, blue chips are a warning.
For screw threads, I reduce radial engagement and avoid dwelling at the crest. A stable feed helps prevent work hardening. NIST material data lists titanium’s elastic behavior and strength as highly temperature-sensitive, so clamping pressure needs careful adjustment. Excessive pressure can distort the small implant blank. I inspect the first parts under magnification. Look for torn roots, smeared flanks, and edge chipping. Tool wear can appear minor, then accelerate quickly. ISO 14971 risk-management principles support recording these changes by batch and operation. I admit one weakness in practice: coolant flow is often checked visually, not measured. That assumption can hide a blocked nozzle or uneven delivery. A simple flow check and infrared temperature reading provide better evidence. Keep cutting data conservative until chip shape, surface finish, and tool life agree.
Inspecting Threads, Surface Finish, and Biocompatibility After Machining
Swiss turning titanium bone screws demands more than dimensional accuracy. Inspect the thread under magnification after machining. Look for torn crests, smeared valleys, burrs, and interrupted flanks. Check pitch diameter with calibrated gauges, not visual judgment alone. Confirm the thread profile against the approved drawing. Titanium can work-harden during cutting. Heat and dull tools may distort delicate features. Record tool condition and cutting parameters for each lot.
Surface finish affects cleaning, handling, and tissue-facing performance. Measure roughness on representative areas, including thread roots and the head transition. A polished-looking screw can still hide sharp microscopic peaks. Use validated cleaning steps, then inspect for chips, lubricant residue, and discoloration. Be careful with passivation claims. Titanium naturally forms an oxide layer, but process residues still matter. I have seen clean-looking parts fail residue checks. That mistake is expensive.
Biocompatibility review begins with material certificates and continues after machining. Verify the alloy, supplier traceability, and exposure to coolants or processing chemicals. Evaluate residues through documented chemical testing and a risk-based biological assessment. Use laboratories with suitable competence and current methods. Keep inspection records linked to lot, operator, equipment, and results. No method is flawless. Recheck assumptions when results look unusually perfect. That pause often reveals sampling gaps or an unclean fixture. Release screws only when thread quality, finish, and biological safety evidence agree.
